 TetherInvert
Scanning#
You need: a running session and the roll's first strip in the holder.
1. Mark the picture area#
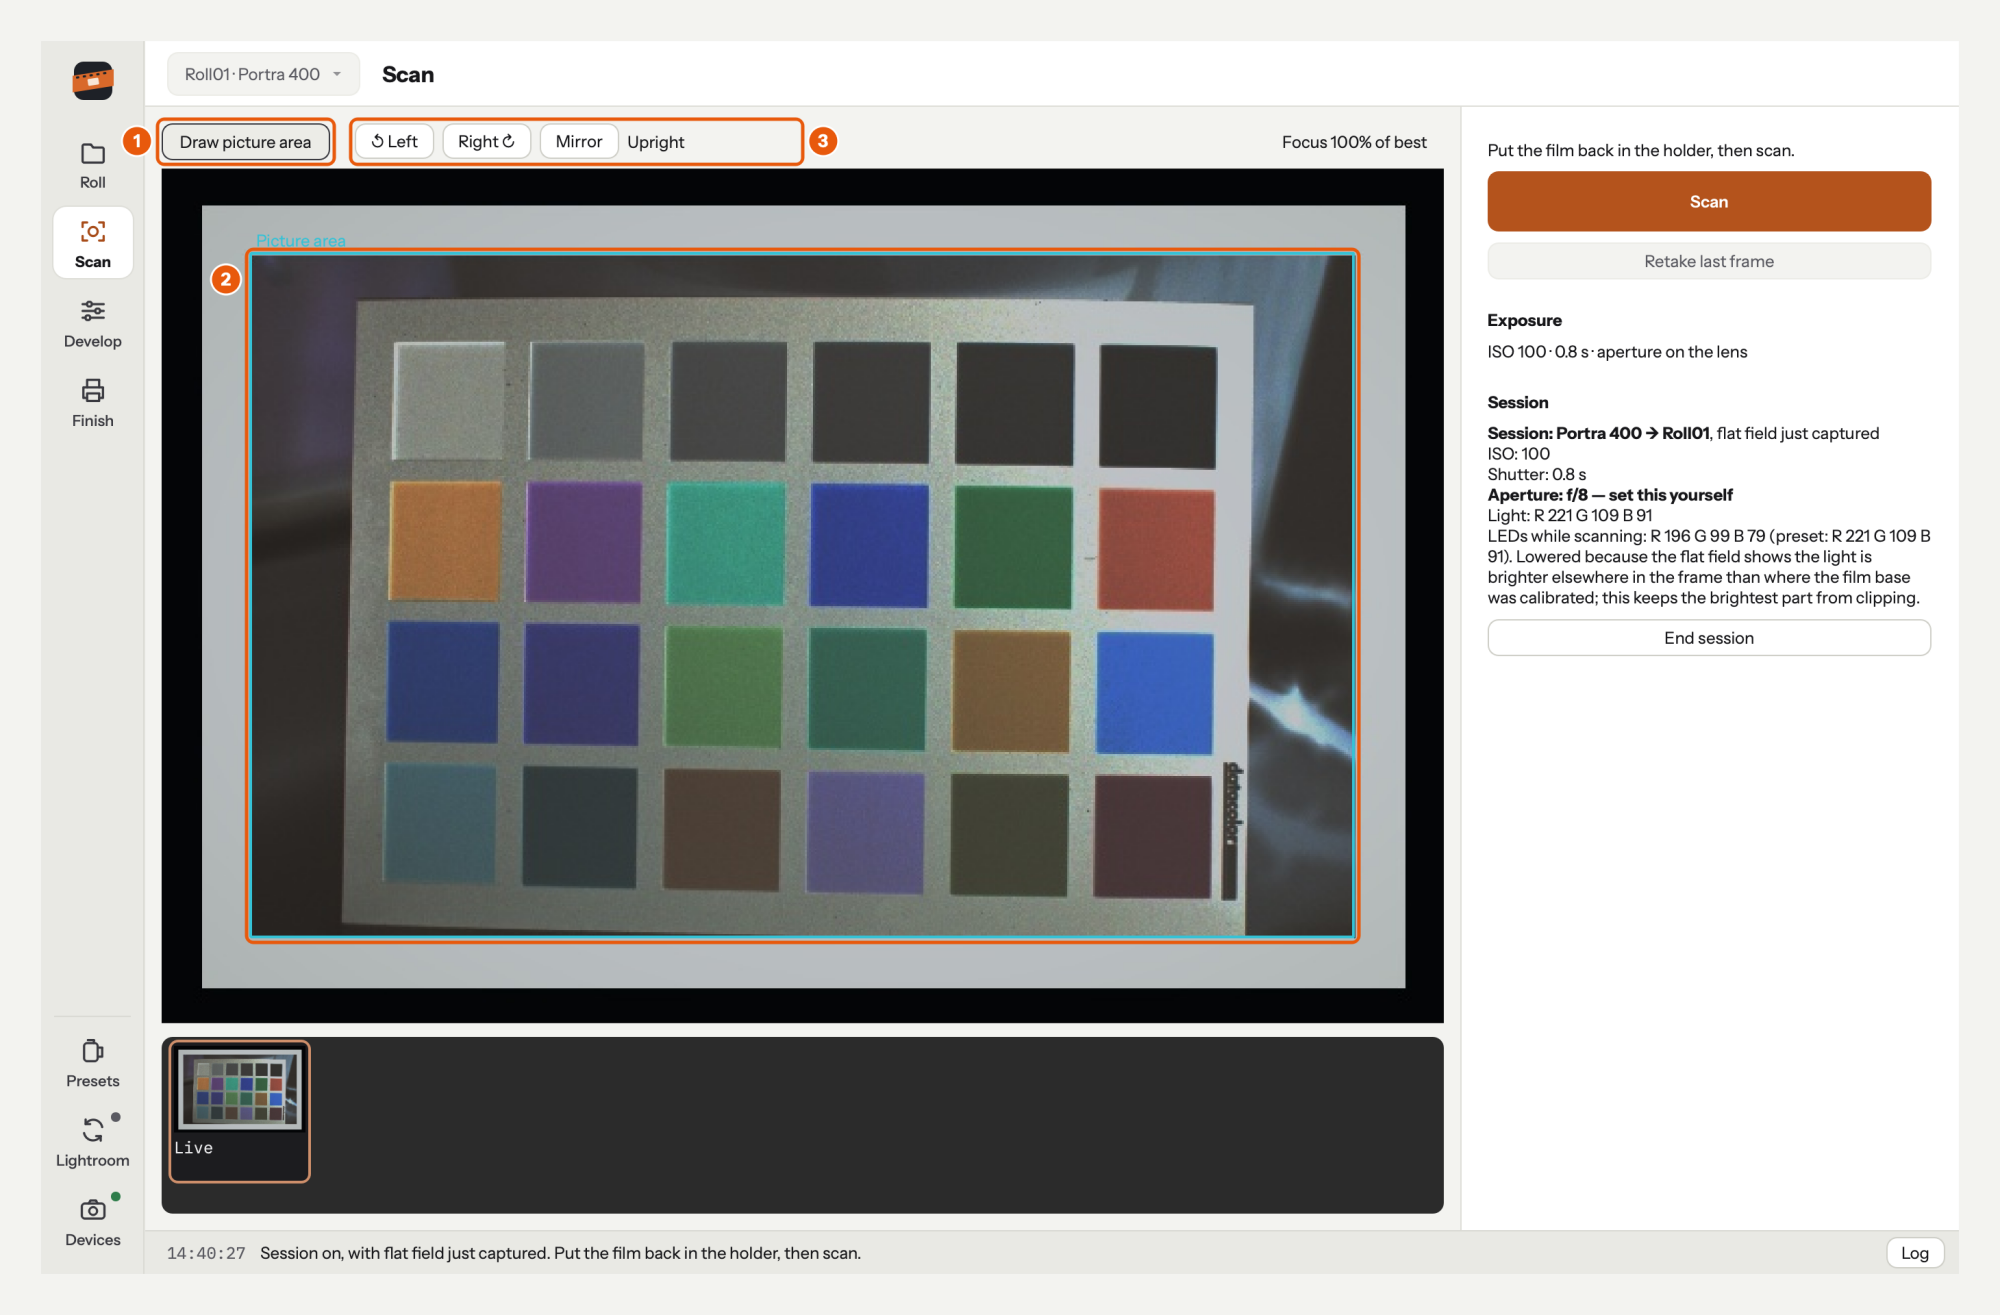
- Click Draw picture area.
- Drag over the image, just inside the rebate. Only this area is measured for the inversion; holder and sprocket holes would skew it. It stays for the whole roll.
- Which way up: ↺ Left, Right ↻ and Mirror (keys Shift+N, N, M) turn and mirror the live view. Frames scanned from then on are written that way up.
For files that hold only the picture area, tick Crop files to the picture area on the Roll page, under Files.
2. Scan the first frame#
Press Space, or click Scan. At a roll's first scan TetherInvert asks which number is printed on the film next to the frame:
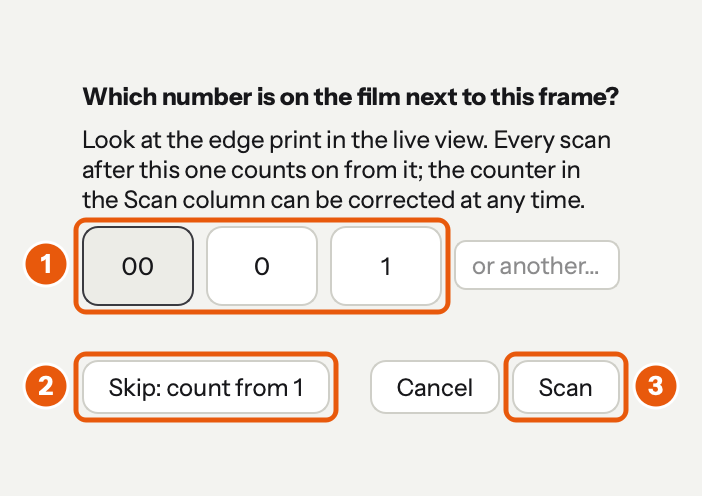
- Click the number on the film's edge (or type another, such as 12).
- Skip counts from 1.
- Click Scan.
Frames are numbered as on the film, and the files are named after it: Roll01_00.tif for 00,
Roll01_000.tif for 0, Roll01_001.tif for 1, so they sort in film order.
3. Scan the rest of the roll#
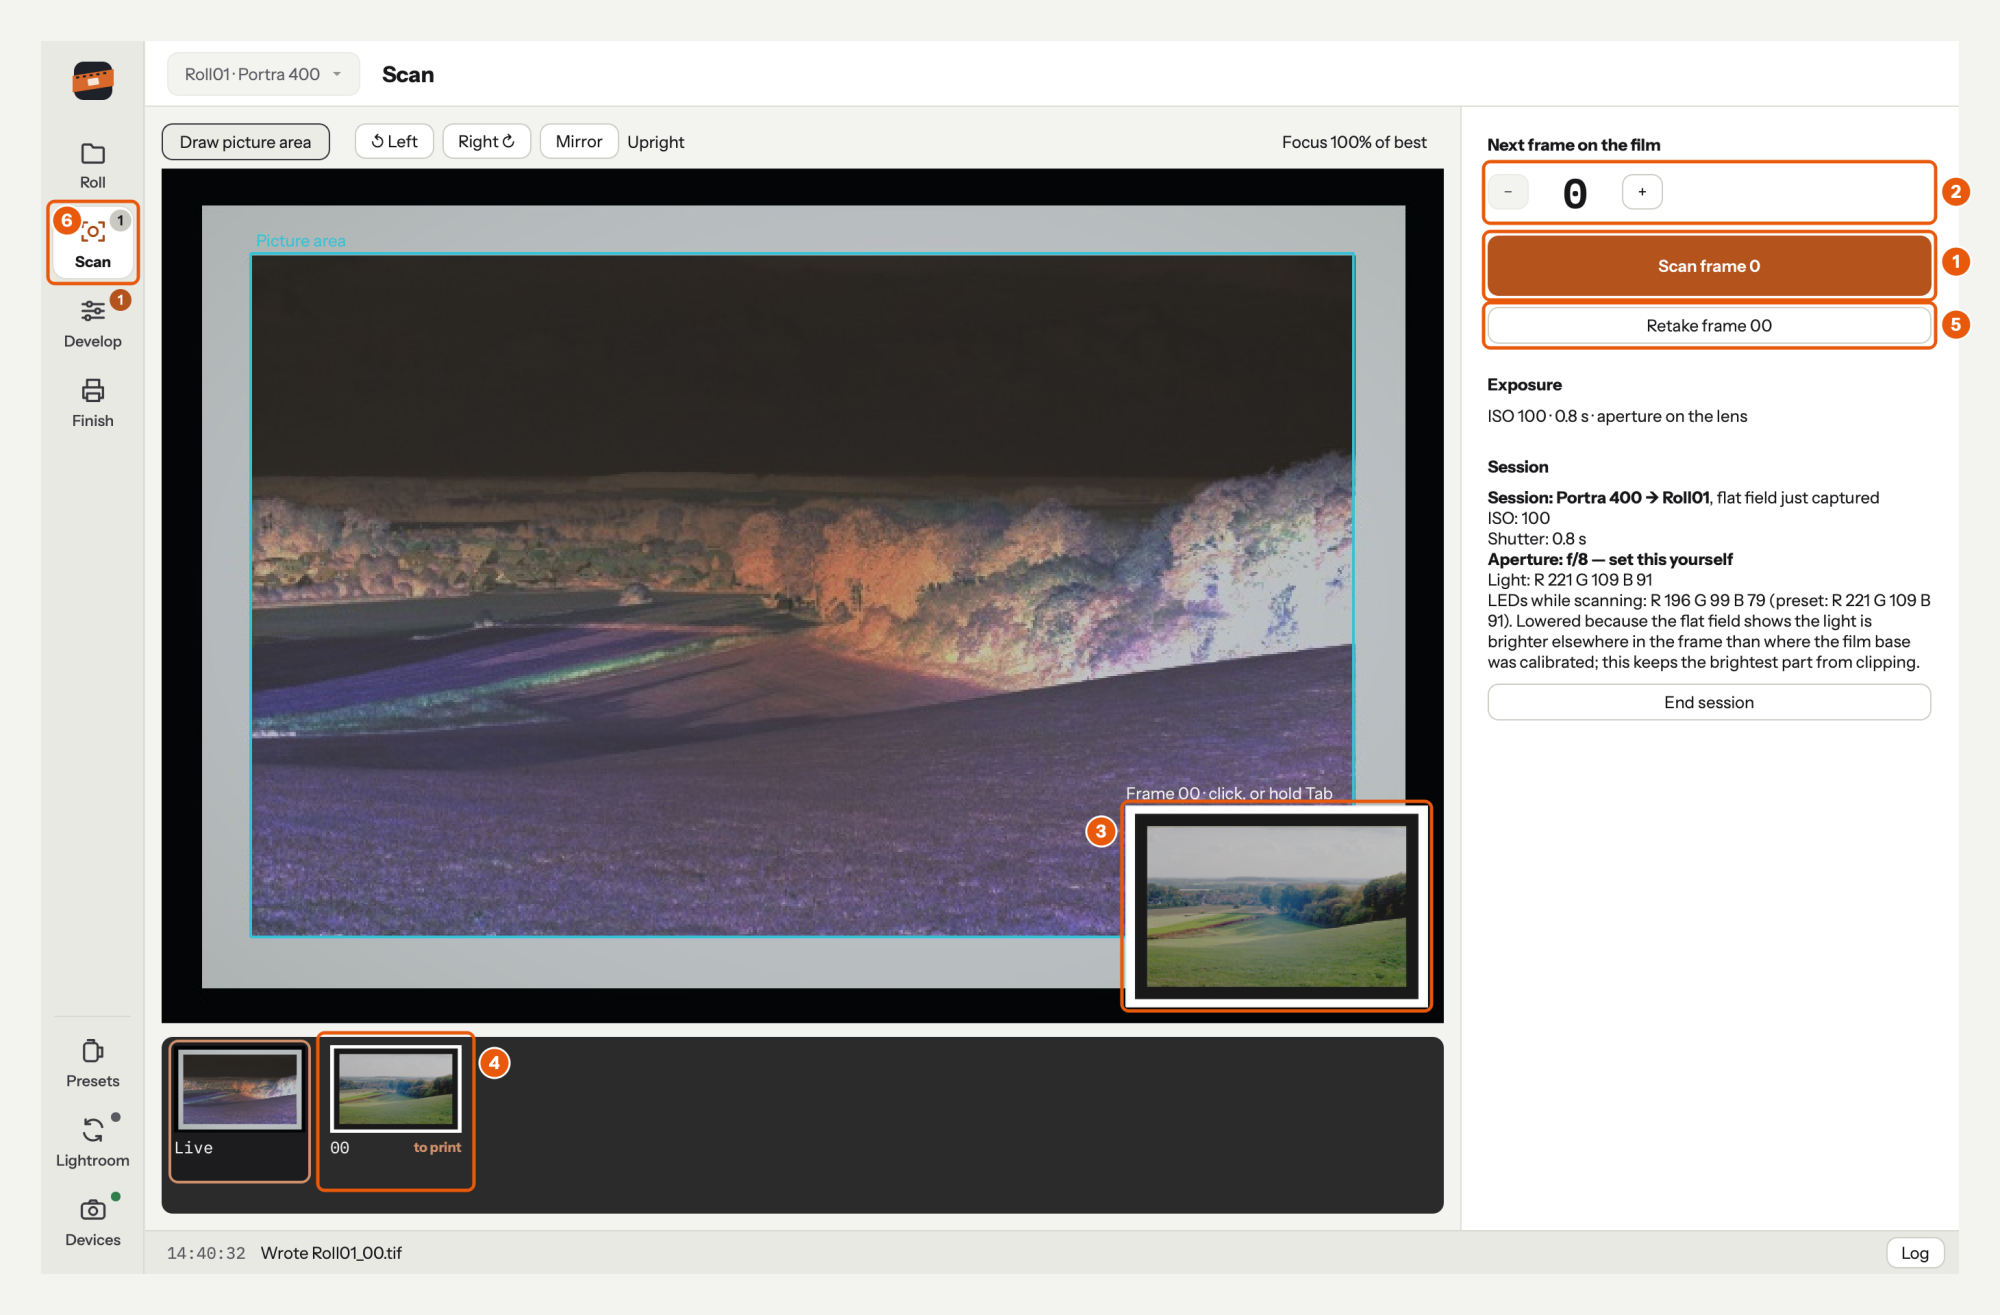
- Scan frame 0 now; the button always says the number the next frame gets. Advance the film, press Space, and so on.
- Next frame on the film − 0 + is the same number. Correct it with − and + when you skip a frame.
- The frame just scanned shows in the corner of the live view for half a minute. Click it to open it on Develop, or hold Tab to look at it and let go to come back.
- Every frame appears in the strip. to print means it has no up-to-date print yet (see Finishing the roll).
- Retake frame 00 shoots the last frame again, for example after the strip moved.
- The rail's Scan counts the frames scanned.
The live view stays up while the frame is written, so you can go straight on to the next. On the author's rig a 36-frame roll took 11 minutes, advancing the film by hand included.
Scanning a frame again#
To replace any frame, not just the last:
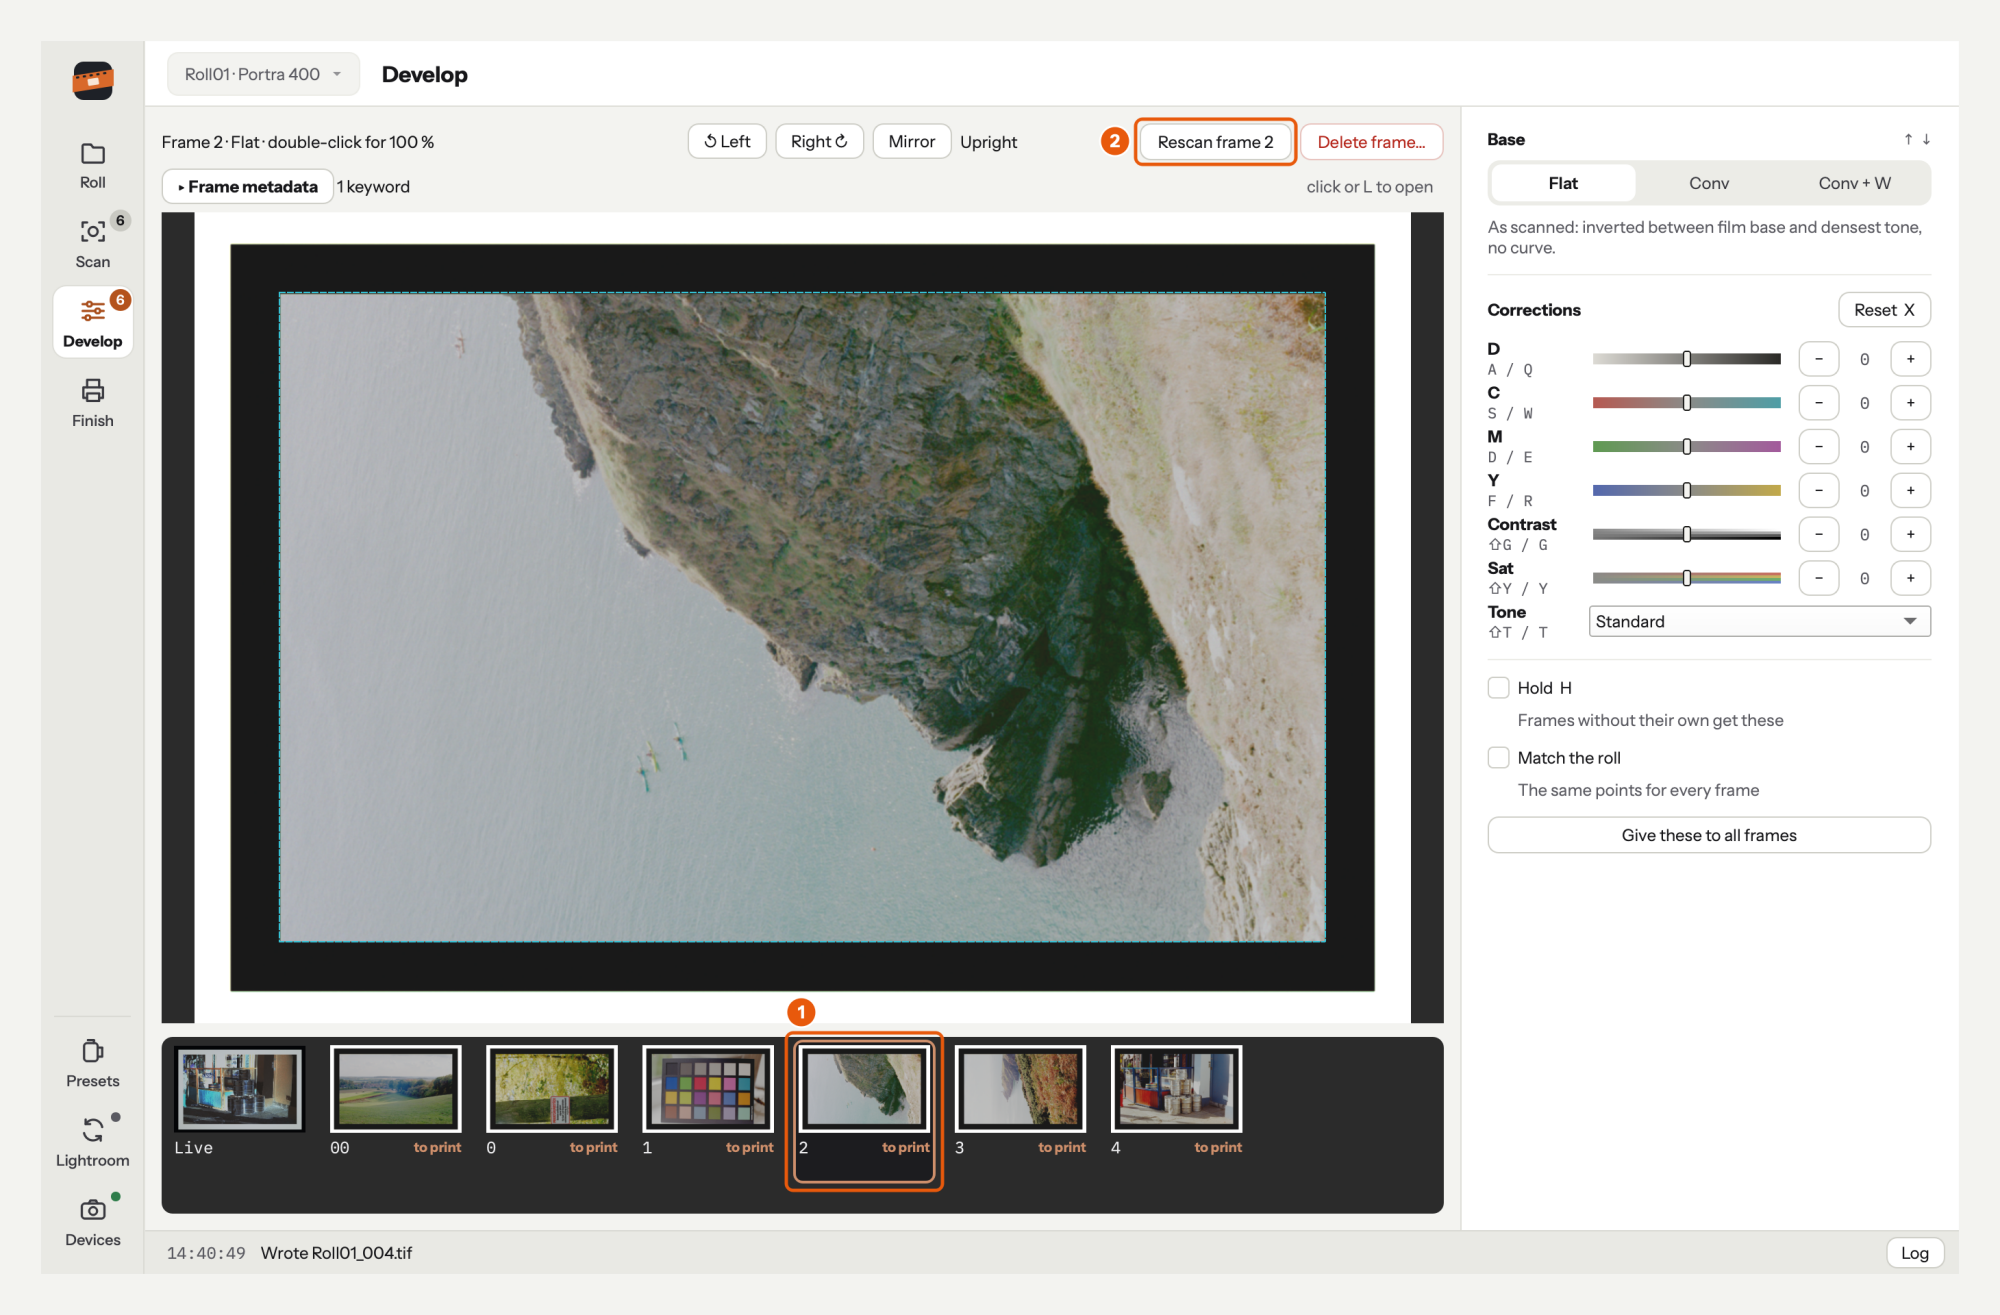
- Click the frame in the strip. It opens on Develop.
- Click Rescan frame 2, above the frame. Nothing is shot yet: Scan and the live view come back. The button is there during the roll's session only.
- Put that frame in the holder and click Replace frame 2 (you are asked once).
- Or Cancel rescan.
The frame keeps its number, base, corrections and metadata. In Lightroom the file keeps its catalog entry and its edits, and shows the new picture.
If a frame is clipped#
After each frame TetherInvert checks its RAW files. If more than 0.1 % of the picture area hit the sensor's ceiling in a colour, the log says so in red:
- With a flat field: the film let more light through than at calibration. Check the f-stop ring; or the strip is thinner than the one you calibrated on.
- Without one: more likely the light is brighter somewhere in the frame than where the film base was metered. Capture a flat field.
Clipped parts of the negative (its thinnest, the picture's shadows) come out as crushed shadows, and no render brings them back. Rescan the frame after fixing the cause.
More#
- Delete frame… (above a frame on Develop, or the Delete key) deletes it with all its files, after asking. The other frames keep their numbers.
- Also save the linear negative (on the Roll page, under Files) keeps the merged image, not
inverted, in
negative/. - Render roll again and Delete RAW files… are on Finish: see The roll's files.
- End session when the roll is done.
Next: develop the frames.